How to Take Black Screen Shot With Nikon D5000
How to Take a Screenshot in Windows 11
The reasons you might need to take a screenshot in Windows 11 are nearly endless. Maybe you need to capture an app or web page to show someone else how to use its interface. Perhaps, you need to screenshot an excerpt from an article and post it to social media, with the relevant parts highlighted, to make a point. Or there could be a picture online or in one of your programs somewhere you just can't save any other way.
No matter why you need to take one, there are a lot of different ways to take a screenshot in Windows 11. The method you use should be based on what you need to capture as some ways give you the whole screen, others give you just a region and still others give you options such as saving directly to disk or initiating a several-second delay before saving the image.
Below, we'll go over six ways to capture screenshots in Windows 11, primarily using the operating system's built-in capabilities. However, our last method uses NGWIN's PicPick, a freemium app that includes a built-in image editor and has the ability to scroll down an entire web page to turn the entire thing into one screenshot, something the OS can't do on its own.
1. PrtSc Key Captures Screenshots to Your Clipboard
The simplest way to take a screenshot in Windows 11 or 10 is to just hit the PrtSc key and your entire desktop will be copied to your clipboard. While easy, the PrtSc method is a little clunky. If you have multiple monitors, you'll grab all the desktops in one huge image and, if you want to save your image as a file, you'll still need to paste it into an image editor such as Microsoft Paint, Gimp or Photoshop.
On the other hand, if you are just emailing the image, including it in a document or posting it to Twitter or Facebook, you can hit just paste by hitting CTRL + V into the relevant editor and you're all set, provided that you want to show your entire screen.

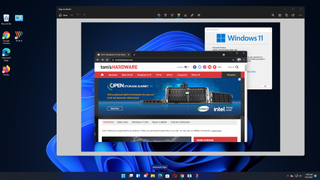
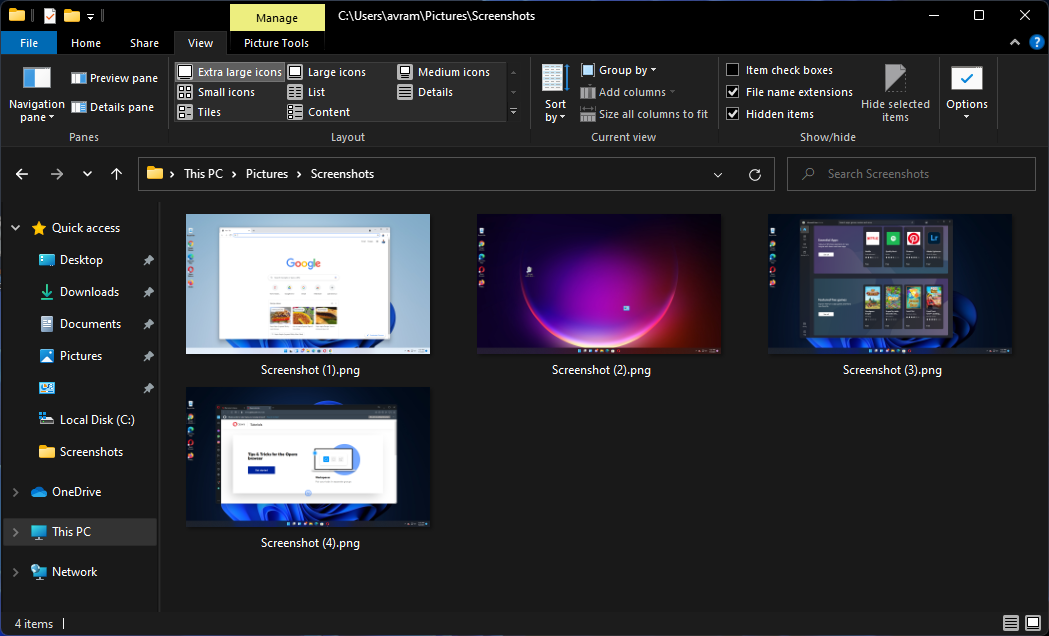
2. Windows Key + PrtScr Saves a File
If you just want to take a screenshot of your entire screen, save it as a file and move on, the easiest way is by hitting Windows Key + PrtScr. Your entire desktop will darken for a second to show that the screenshot has been captured and a new PNG file will be saved to the Pictures/Screenshots folder. Each file will be given the name Screenshot (#).png where # is replaced by 1, 2, 3, etc.
3. Alt + PrtScr Captures the Active Window
More often than not, you don't want to screenshot your entire desktop, just the relevant program you're using. If you hit Alt + PrtScr, Windows 11 will capture just the active window and copy it to your clipboard.
It's important to note that this only screenshots an active window, not an entire app if the app has more than one window. So, for example, if your program has a pop-up menu that appears in a child window, it will only capture the child window, not the parent behind it.
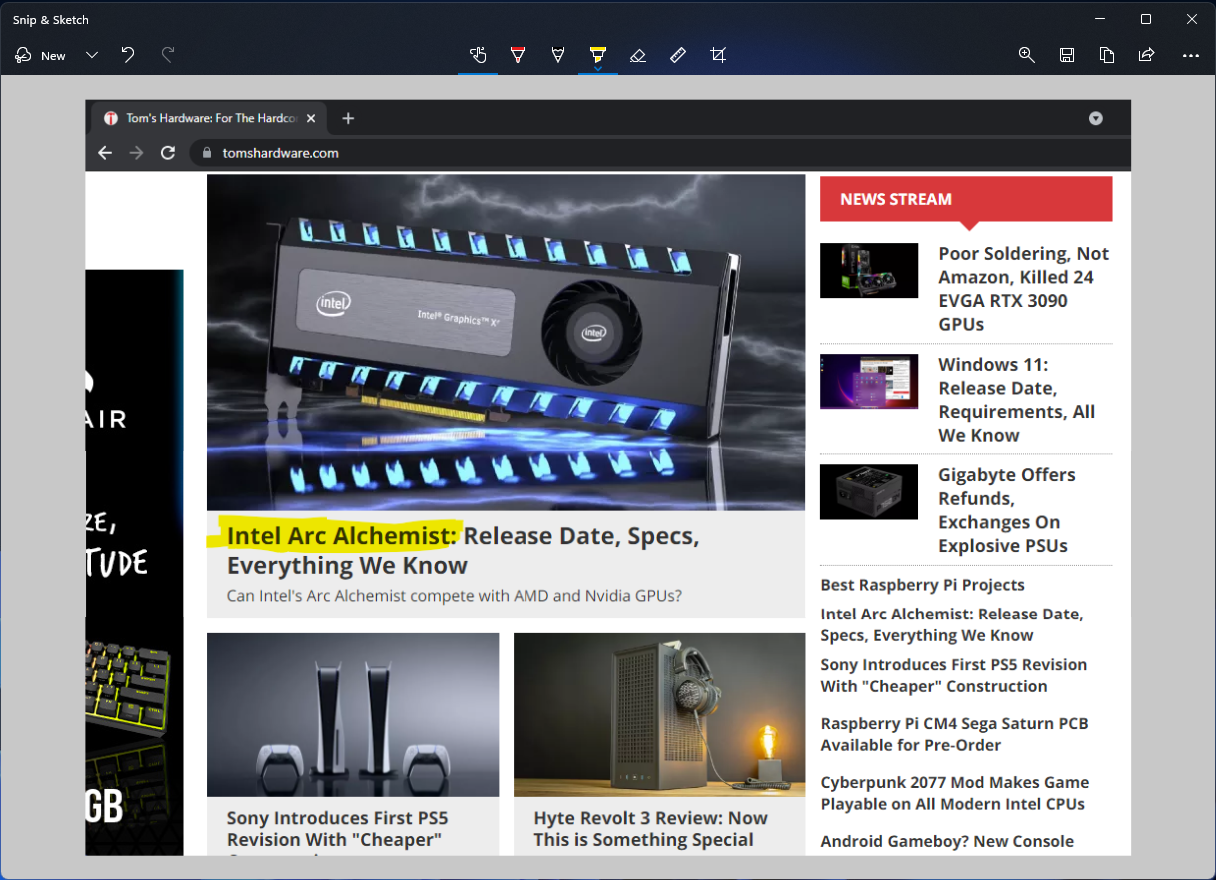
Perhaps you want to screenshot just a small portion of the desktop. It could be a portion of a web page in your browser or a series of windows. Whatever the case, hit Windows Key + Shift + S and the Windows Snip & Sketch tool will launch, immediately giving you a rectangular box you can draw around whatever you want to capture from Windows 11.
If you don't want to screenshot a rectangular portion of the desktop, you can also choose to freeform sketch a shape, capture the active window or the full screen. Your picture will be captured to the clipboard, but you'll also get a Windows notification that shows what you captured and, if you click it, you'll open the Sketch portion of the Snip & Sketch Tool, where you can draw on top of your screenshot, crop it or highlight sections of it with a yellow highlighter.
5. Take a Delayed Screenshot
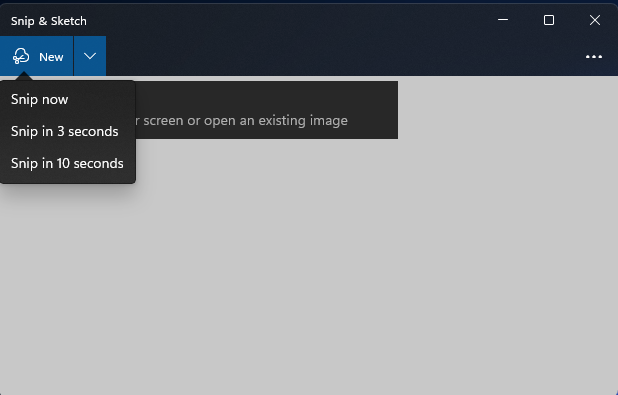
Sometimes you need to take a screenshot not right now, but a few seconds from now. Why wait? Because if you need to take a screenshot of yourself activating a pulldown menu or some other item, hitting the PrtScr key or another key combination could make your menu go away before the OS snaps a picture. So you want to activate a screenshot that occurs in the future, giving you time to get to that menu.
To do a delayed screenshot in Windows 11, launch Snip & Sketch, not via keyboard shortcut but either by searching for it or from the Start menu. Then select "Snip in 3 seconds" or "Snip in 10 seconds" from the New menu. Do what you want to capture within that time frame and the Snip & Sketch tools will appear and let you draw a box around it.
6. Capture a Full Web Page / Include the Pointer
There are a couple of things you simply cannot capture with Windows 11's built-in screenshot capabilities. You can't get Snip & Sketch to scroll down the length of a web page or other scrolling document -- a PDF for example -- and capture the whole thing. And you can't include mouse pointer in your captures.
However, if you install PicPick, you can do both of those things. To capture the entire contents of a webpage, click on the PicPick tray icon and select Screen Capture->Scrolling Window or hit CTRL + ALT + PrtScr (you can also assign a custom hot key). Then select the web browser you tab you want to capture from and watch as it scrolls through the whole page and captures it.
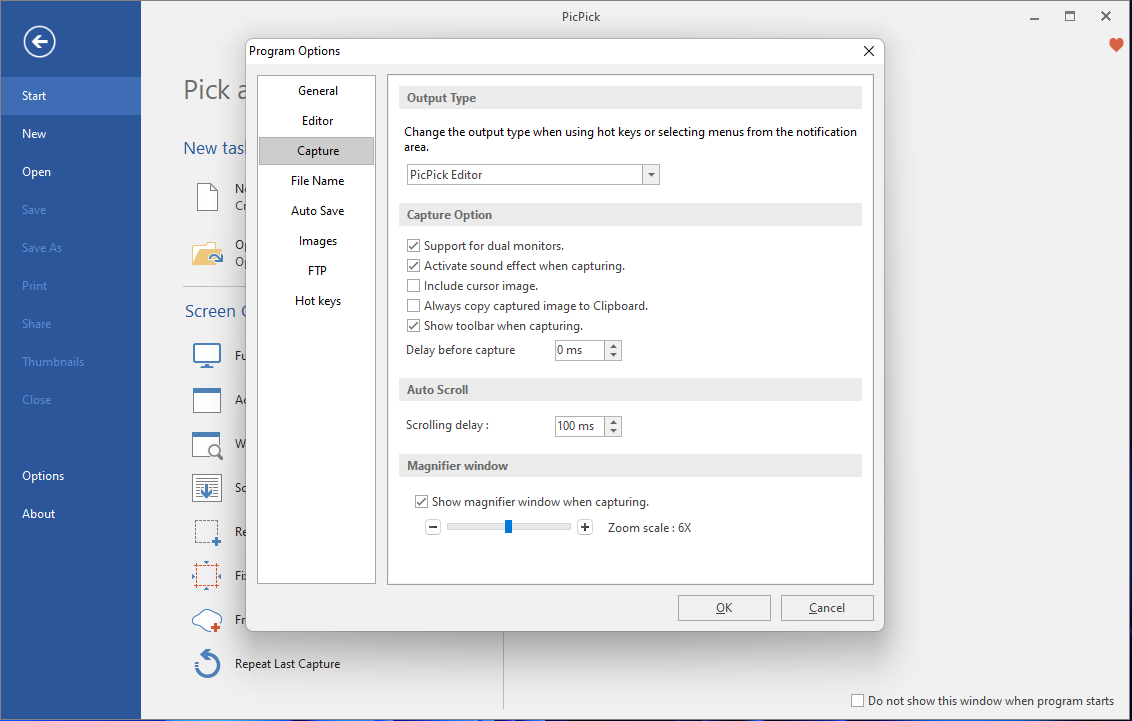
If you want to include the mouse pointer in any of your captures, open the Program Options menu, navigate to the Capture tab and check "include cursor image."
Another great thing about PicPick is that it allows you to set your own custom hot keys for all of its capture features. And it includes an editor that's much more robust than Snip & Sketch so you can draw colorful boxes or circles around the areas of the image you want to highlight.

Avram Piltch is Tom's Hardware's editor-in-chief. When he's not playing with the latest gadgets at work or putting on VR helmets at trade shows, you'll find him rooting his phone, taking apart his PC or coding plugins. With his technical knowledge and passion for testing, Avram developed many real-world benchmarks, including our laptop battery test.
How to Take Black Screen Shot With Nikon D5000
Source: https://www.tomshardware.com/how-to/take-screenshots-windows-11
0 Response to "How to Take Black Screen Shot With Nikon D5000"
Post a Comment